☎ Call or Text (929) 242-5500 ✉ leatherfixup@gmail.com
How to Fix a Cracked Leather Sofa - Step-by-Step Guide
Cracked leather doesn't mean a ruined sofa. This step-by-step guide covers cleaning, filling, recoloring and finishing cracked leather - plus when DIY isn't enough and professional mobile repair makes more sense. Serving Brooklyn, Queens, Manhattan and Nassau County.
4/8/20267 min read
How to Fix a Cracked Leather Sofa - Step-by-Step Guide
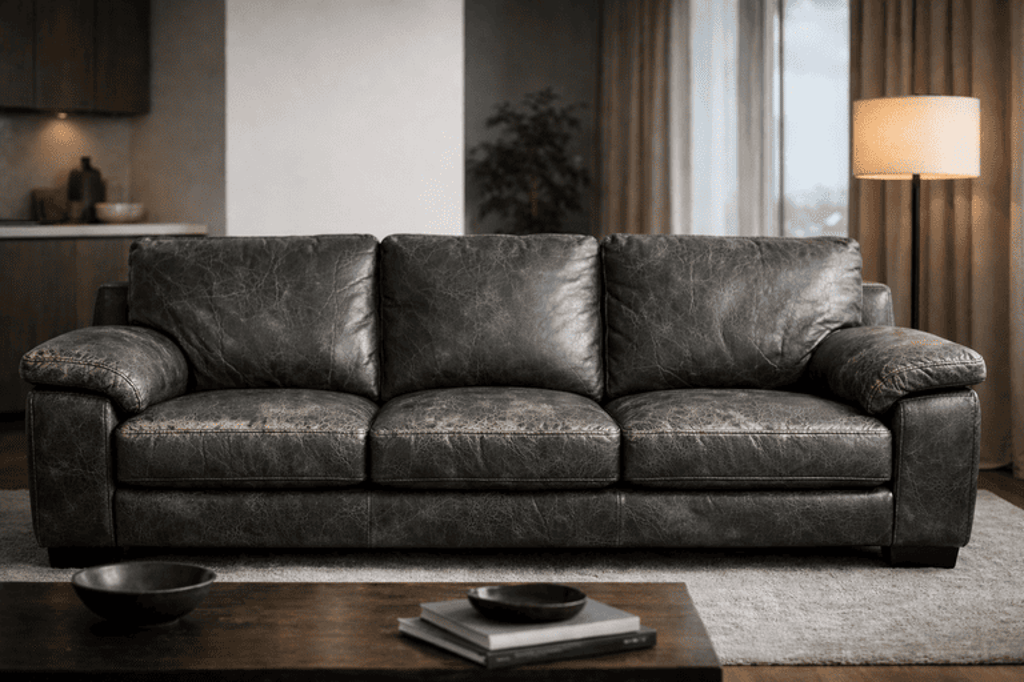
A cracked leather sofa is one of the most common problems homeowners face - and one of the most misunderstood. Many people assume that once leather starts cracking, the sofa is ruined. In reality, cracked leather can often be repaired, restored, and brought back to life - sometimes dramatically so.
This guide walks you through the causes of leather cracking, what you can do at home for minor damage, and when it makes sense to call a professional leather repair specialist for more significant restoration.
Why Does Leather Crack?
Before attempting any repair, it helps to understand why leather cracks in the first place. The most common causes are:
Lack of moisture and conditioning - Leather is a natural material that needs regular conditioning to stay supple. Without it, the surface dries out, loses flexibility, and eventually cracks. This is the most common cause of cracking in genuine leather sofas.
Sun and heat exposure - Direct sunlight and heat sources like radiators or vents dry leather out rapidly and cause the surface finish to break down. UV exposure also fades the color, which accelerates visible cracking.
Age and wear - Even well-maintained leather will show surface cracking after many years of regular use. High-traffic areas like seat cushions, armrests, and headrests are the first to show wear.
Bonded or faux leather deterioration - Bonded leather - a material made from leather fibers bonded with polyurethane - does not crack in the same way genuine leather does. Instead, it peels and flakes as the polyurethane coating separates from the backing. This is a different problem that requires a different repair approach.
Understanding which type of leather you have and what caused the cracking will determine the best repair method.
Step 1 - Assess the Damage
Before reaching for any repair product, take a close look at the cracking and assess its severity:
Surface cracking - Fine, shallow cracks in the leather's finish only, without penetrating through to the hide beneath. This is the most repairable type of damage and often responds well to conditioning and re-finishing alone.
Deep cracking - Cracks that penetrate through the finish into the leather itself. These require filler compounds to restore a smooth surface before refinishing.
Peeling and flaking - If the surface is peeling rather than cracking, you likely have bonded or faux leather. Standard crack repair products will not work effectively on bonded leather - this requires specialized vinyl and bonded leather restoration techniques.
Structural cracking - Very severe cracking that has caused the leather to split or tear. This typically requires professional repair to achieve a durable and seamless result.
Step 2 - Clean the Surface Thoroughly
Proper cleaning before any repair is essential. Applying filler or conditioner over a dirty surface traps dirt beneath the repair and prevents products from bonding correctly.
What you need:
Mild leather cleaner or a small amount of dish soap diluted in warm water
Soft lint-free cloths
Soft-bristle brush for textured areas
How to clean:
Apply a small amount of leather cleaner to a soft cloth - never apply directly to the leather
Wipe the cracked area gently in circular motions, removing dirt, oils, and any loose flaking material
Use a soft brush to work cleaner into textured or cracked areas
Wipe clean with a fresh damp cloth
Allow the leather to dry completely - at least 30 minutes - before proceeding
Never use alcohol, bleach, or household cleaning sprays on leather. These strip the natural oils and protective finish, accelerating further damage.
Step 3 - Apply Leather Conditioner
For surface-level cracking caused by dryness, conditioning alone can make a significant difference. Leather conditioner replenishes the natural oils that keep leather supple and can reduce the appearance of fine surface cracks.
How to condition:
Apply a small amount of quality leather conditioner to a soft cloth
Work it into the leather in circular motions, paying extra attention to cracked areas
Allow it to absorb for at least 15 -20 minutes
Buff gently with a clean dry cloth
For minor surface cracking, repeat this process two or three times over a few days. You may notice the cracks becoming less visible as the leather rehydrates and regains flexibility.
Important: Conditioning helps maintain leather and reduces minor surface cracking, but it cannot fill deep cracks or restore missing finish. For more significant damage, proceed to the next steps.
Step 4 - Fill the Cracks
For deeper cracks that conditioning alone cannot address, a leather filler compound is needed. Leather filler is a flexible, water-based compound that fills gaps in the leather surface and dries to a smooth, workable finish.
What you need:
Leather filler compound (available at leather repair supply stores)
Palette knife or spatula
Fine grit sandpaper (400–600 grit)
Soft cloth
How to fill cracks:
Apply a small amount of leather filler to the crack using a palette knife or your fingertip
Press the filler firmly into the crack, ensuring it fills the full depth
Smooth the surface with the palette knife, removing excess filler from the surrounding area
Allow to dry completely - typically 20 -30 minutes depending on the product
Once dry, sand very lightly with fine grit sandpaper to smooth any uneven areas
Repeat the process for deeper cracks - two or three thin layers produce a better result than one thick application
Work in small sections rather than trying to fill large areas at once. Thin, even layers dry more uniformly and are less likely to crack again after the repair.
Step 5 - Restore the Color
Once the cracks are filled and the surface is smooth, the repaired area will likely appear a different color or texture from the surrounding leather. This is where color restoration comes in.
For small repairs, leather touch-up paint or colorant - matched to your sofa's color - can be applied over the filled area to blend the repair with the original leather.
How to apply color:
Apply a thin coat of leather colorant to the repaired area using a small sponge or soft cloth
Allow to dry fully before applying a second coat
Build up color gradually with multiple thin coats rather than one heavy application
Feather the edges of the color into the surrounding leather to create a gradual, natural blend
Color matching is the hardest part of DIY leather repair. Getting an exact color match from a retail product is very difficult, particularly for aged leather where the original color has faded unevenly. This is one of the primary reasons professional results look dramatically better than DIY repairs - professional technicians mix custom color formulas to match your specific leather precisely.
Step 6 - Apply a Leather Finish Coat
The final step is applying a protective finish coat over the repaired and recolored area. Leather finish - also called top coat or sealer - protects the repair, restores the original sheen of the leather, and helps the repaired area blend naturally with the surrounding surface.
How to apply:
Apply a thin, even coat of leather finish using a soft sponge or cloth
Allow to dry fully - at least 30 minutes
Apply a second coat for added protection and sheen consistency
Once fully dry, buff gently with a soft cloth
Choose a finish that matches the sheen level of your original leather - matte, semi-gloss, or gloss. Applying a high-gloss finish to a leather sofa that originally had a matte appearance will make the repair stand out rather than blend in.
When DIY Repair Is Not Enough
Home repair kits and the steps above work reasonably well for minor surface cracking and small damaged areas. However, there are situations where a DIY approach will produce disappointing results and professional repair is the better choice:
Large cracked areas - When cracking covers a significant portion of the sofa - an entire seat cushion, armrest, or back panel - achieving a consistent color match and smooth finish across a large area is extremely difficult without professional equipment.
Deep or structural cracks - Cracks that have caused the leather to split or separate require sub-patch materials and professional bonding techniques to repair durably. A DIY filler will not hold in high-stress areas.
Bonded leather peeling - Bonded leather deterioration cannot be effectively repaired with standard crack repair products. Restoration requires specialized materials and techniques.
Color matching challenges - If your sofa is an unusual color, has faded significantly, or has a complex texture, achieving an invisible repair requires custom color mixing that is only available through professional technicians.
Previous failed repair attempts - If you have already tried a DIY repair that did not hold or looks worse than the original damage, a professional will need to remove the previous repair material before attempting restoration - adding complexity to the job.
What a Professional Leather Repair Looks Like
A professional mobile leather repair technician brings everything needed to restore cracked leather directly to your home - no furniture transportation required.
The professional process differs from DIY in several important ways:
Custom color matching - Professional technicians mix color formulas specifically matched to your leather, accounting for fading, texture, and sheen. The result blends seamlessly with the surrounding leather rather than standing out as an obvious patch.
Professional-grade materials - Professional leather fillers, colorants, and finish coats are significantly more durable and flexible than retail products. They are formulated to withstand the stress of regular use without cracking or peeling.
Preparation and technique - Proper leather preparation - including cleaning, degreasing, and surface preparation - is critical to a lasting repair. Professional technicians follow a precise process that ensures materials bond correctly and the repair holds long-term.
Warranty on work - Reputable leather repair specialists stand behind their work. A DIY repair comes with no such guarantee.
For minor surface cracking on a single cushion or small area, a DIY approach can produce acceptable results. For anything more significant, the cost difference between a professional repair and replacement is substantial enough that professional restoration is almost always the more economical choice.
How to Prevent Leather from Cracking Again
Once your leather sofa has been repaired - professionally or at home - the following habits will keep it in good condition for years to come:
Condition regularly - Apply a quality leather conditioner every 3-6 months to keep the leather supple and prevent drying
Keep away from direct sunlight - Position your sofa away from windows or use curtains to block UV exposure
Avoid heat sources - Keep the sofa away from radiators, heating vents, and fireplaces
Clean spills immediately - Blot liquid spills promptly with a dry cloth - never rub, as this spreads the spill and can damage the finish
Use a leather protector - A quality leather protection spray creates a barrier against moisture, oils, and UV damage
Serving NYC Brooklyn, Queens, Manhattan & Nassau County
LeatherFixUp provides professional mobile upholstery and leather repair throughout the New York metro area, including Brooklyn, Queens, Manhattan, and Nassau County, Long Island. We come directly to your home - no furniture transportation required - and restore sofas, sectionals, recliners, and all types of upholstered seating on-site.
If your sofa is sagging, sunken, or simply not as comfortable as it used to be, send us a few photos and we will give you an honest assessment of what is causing the problem and what repair would involve.
For answers about pricing, repair time, and service process, see our FAQ page
See our Before & After gallery to view real results of leather repairs.
If you’d like a quote, you can get an Estimate here.
Are you a mover, furniture store, designer, or insurance professional looking for a repair partner? Visit our Business & Partner Inquiries page.
Our Services
Leather Furniture Restoration and Upholstery
Leather & Vinyl Repair
Leather furniture re-dyeing
Restoration for Medical & Professional Spaces
Automotive interior Restoration for Cars, Buses, Vans, RVs
Marine Upholstery Restoration Services
Restoration for Hospitality and Commercial Furniture
Business & Partner Inquiries
Contact Us
LeatherFixUp
Mobile Leather Repair
Brooklyn, NY
Phone / Text:
(929) 242-5500